Qt如何實現(xiàn)IP地址輸入控件
本篇內(nèi)容介紹了“Qt如何實現(xiàn)IP地址輸入控件”的有關(guān)知識,在實際案例的操作過程中,不少人都會遇到這樣的困境,接下來就讓小編帶領(lǐng)大家學(xué)習(xí)一下如何處理這些情況吧!希望大家仔細(xì)閱讀,能夠?qū)W有所成!
成都創(chuàng)新互聯(lián)-專業(yè)網(wǎng)站定制、快速模板網(wǎng)站建設(shè)、高性價比益陽網(wǎng)站開發(fā)、企業(yè)建站全套包干低至880元,成熟完善的模板庫,直接使用。一站式益陽網(wǎng)站制作公司更省心,省錢,快速模板網(wǎng)站建設(shè)找我們,業(yè)務(wù)覆蓋益陽地區(qū)。費用合理售后完善,10余年實體公司更值得信賴。
一、前言
這個IP地址輸入框控件,估計寫爛了,網(wǎng)上隨便一搜索,保證一大堆,估計也是因為這個控件太容易了,非常適合新手練手,一般的思路都是用4個qlineedit控件拼起來,然后每個輸入框設(shè)置正則表達式過濾只能輸入3位數(shù)字,然后安裝事件過濾器識別回車自動跳到下一個輸入框。關(guān)于如何設(shè)置正則表達式過濾,這個可以搜索查到,本人也不大懂這個規(guī)則,貌似還有專門的書籍專門介紹正則表達式,可能這塊非常強大。
主要功能:
可設(shè)置IP地址,自動填入框
可清空IP地址
支持按下小圓點自動切換
支持退格鍵自動切換
支持IP地址過濾
可設(shè)置背景色/邊框顏色/邊框圓角角度
二、代碼思路
IPAddress::IPAddress(QWidget *parent) : QWidget(parent)
{
bgColor = "#FFFFFF";
borderColor = "#A6B5B8";
borderRadius = 3;
//用于顯示小圓點的標(biāo)簽,居中對齊
labDot1 = new QLabel;
labDot1->setAlignment(Qt::AlignCenter);
labDot1->setText(".");
labDot2 = new QLabel;
labDot2->setAlignment(Qt::AlignCenter);
labDot2->setText(".");
labDot3 = new QLabel;
labDot3->setAlignment(Qt::AlignCenter);
labDot3->setText(".");
//用于輸入IP地址的文本框,居中對齊
txtIP1 = new QLineEdit;
txtIP1->setObjectName("txtIP1");
txtIP1->setAlignment(Qt::AlignCenter);
txtIP1->setSizePolicy(QSizePolicy::Expanding, QSizePolicy::Expanding);
connect(txtIP1, SIGNAL(textChanged(QString)), this, SLOT(textChanged(QString)));
txtIP2 = new QLineEdit;
txtIP2->setObjectName("txtIP2");
txtIP2->setAlignment(Qt::AlignCenter);
txtIP2->setSizePolicy(QSizePolicy::Expanding, QSizePolicy::Expanding);
connect(txtIP2, SIGNAL(textChanged(QString)), this, SLOT(textChanged(QString)));
txtIP3 = new QLineEdit;
txtIP3->setObjectName("txtIP3");
txtIP3->setAlignment(Qt::AlignCenter);
txtIP3->setSizePolicy(QSizePolicy::Expanding, QSizePolicy::Expanding);
connect(txtIP3, SIGNAL(textChanged(QString)), this, SLOT(textChanged(QString)));
txtIP4 = new QLineEdit;
txtIP4->setObjectName("txtIP4");
txtIP4->setAlignment(Qt::AlignCenter);
txtIP4->setSizePolicy(QSizePolicy::Expanding, QSizePolicy::Expanding);
connect(txtIP4, SIGNAL(textChanged(QString)), this, SLOT(textChanged(QString)));
//設(shè)置IP地址校驗過濾
QRegExp regExp("(2[0-5]{2}|2[0-4][0-9]|1?[0-9]{1,2})");
QRegExpValidator *validator = new QRegExpValidator(regExp, this);
txtIP1->setValidator(validator);
txtIP2->setValidator(validator);
txtIP3->setValidator(validator);
txtIP4->setValidator(validator);
//綁定事件過濾器,識別鍵盤按下
txtIP1->installEventFilter(this);
txtIP2->installEventFilter(this);
txtIP3->installEventFilter(this);
txtIP4->installEventFilter(this);
QFrame *frame = new QFrame;
frame->setObjectName("frameIP");
QStringList qss;
qss.append(QString("QFrame#frameIP{border:1px solid %1;border-radius:%2px;}").arg(borderColor).arg(borderRadius));
qss.append(QString("QLabel{min-width:15px;background-color:%1;}").arg(bgColor));
qss.append(QString("QLineEdit{background-color:%1;border:none;}").arg(bgColor));
qss.append(QString("QLineEdit#txtIP1{border-top-left-radius:%1px;border-bottom-left-radius:%1px;}").arg(borderRadius));
qss.append(QString("QLineEdit#txtIP4{border-top-right-radius:%1px;border-bottom-right-radius:%1px;}").arg(borderRadius));
frame->setStyleSheet(qss.join(""));
QVBoxLayout *verticalLayout = new QVBoxLayout(this);
verticalLayout->setMargin(0);
verticalLayout->setSpacing(0);
verticalLayout->addWidget(frame);
//將控件按照橫向布局排列
QHBoxLayout *layout = new QHBoxLayout(frame);
layout->setMargin(0);
layout->setSpacing(0);
layout->addWidget(txtIP1);
layout->addWidget(labDot1);
layout->addWidget(txtIP2);
layout->addWidget(labDot2);
layout->addWidget(txtIP3);
layout->addWidget(labDot3);
layout->addWidget(txtIP4);
}
bool IPAddress::eventFilter(QObject *watched, QEvent *event)
{
if (event->type() == QEvent::KeyPress) {
QLineEdit *txt = (QLineEdit *)watched;
if (txt == txtIP1 || txt == txtIP2 || txt == txtIP3 || txt == txtIP4) {
QKeyEvent *key = (QKeyEvent *)event;
//如果當(dāng)前按下了小數(shù)點則移動焦點到下一個輸入框
if (key->text() == ".") {
this->focusNextChild();
}
//如果按下了退格鍵并且當(dāng)前文本框已經(jīng)沒有了內(nèi)容則焦點往前移
if (key->key() == Qt::Key_Backspace) {
if (txt->text().length() <= 1) {
this->focusNextPrevChild(false);
}
}
}
}
return QWidget::eventFilter(watched, event);
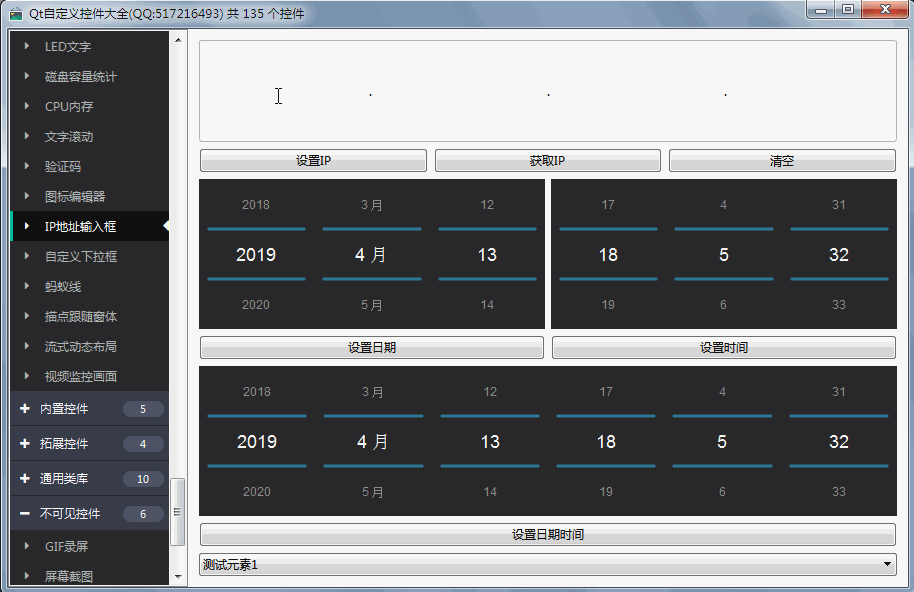
}三、效果圖
“Qt如何實現(xiàn)IP地址輸入控件”的內(nèi)容就介紹到這里了,感謝大家的閱讀。如果想了解更多行業(yè)相關(guān)的知識可以關(guān)注創(chuàng)新互聯(lián)網(wǎng)站,小編將為大家輸出更多高質(zhì)量的實用文章!
網(wǎng)頁標(biāo)題:Qt如何實現(xiàn)IP地址輸入控件
分享網(wǎng)址:http://www.chinadenli.net/article44/iehhhe.html
成都網(wǎng)站建設(shè)公司_創(chuàng)新互聯(lián),為您提供品牌網(wǎng)站設(shè)計、全網(wǎng)營銷推廣、企業(yè)網(wǎng)站制作、網(wǎng)站制作、自適應(yīng)網(wǎng)站、域名注冊
聲明:本網(wǎng)站發(fā)布的內(nèi)容(圖片、視頻和文字)以用戶投稿、用戶轉(zhuǎn)載內(nèi)容為主,如果涉及侵權(quán)請盡快告知,我們將會在第一時間刪除。文章觀點不代表本網(wǎng)站立場,如需處理請聯(lián)系客服。電話:028-86922220;郵箱:631063699@qq.com。內(nèi)容未經(jīng)允許不得轉(zhuǎn)載,或轉(zhuǎn)載時需注明來源: 創(chuàng)新互聯(lián)

- 深圳羅湖網(wǎng)站設(shè)計公司談網(wǎng)頁建設(shè)細(xì)節(jié) 2022-06-06
- 企業(yè)網(wǎng)站設(shè)計公司:上海企業(yè)網(wǎng)站有收錄卻沒有排名 2020-11-16
- 怎樣進行上海網(wǎng)站建設(shè)-上海網(wǎng)站設(shè)計公司、上海網(wǎng)站建設(shè)公司 2020-11-05
- 進行網(wǎng)站建設(shè)上海網(wǎng)站建設(shè)公司、上海網(wǎng)站設(shè)計公司是 2020-11-05
- 小說網(wǎng)站連載的方法在上海網(wǎng)站建設(shè)公司、上海網(wǎng)站設(shè)計公司網(wǎng)站建設(shè)上有什么作用 2020-11-07
- 如何把握網(wǎng)站建設(shè)的方向-成都網(wǎng)站設(shè)計公司 2023-03-12
- 深圳網(wǎng)站設(shè)計公司描述利用SQL注入工具的方法 2022-06-30
- 企業(yè)如何選擇網(wǎng)站設(shè)計公司 2016-11-08
- 上海網(wǎng)站建設(shè)公司和上海網(wǎng)站設(shè)計公司揭秘企業(yè)網(wǎng)站的重要性 2020-11-08
- 網(wǎng)站設(shè)計公司的網(wǎng)頁視覺創(chuàng)意需要抓住哪些要點呢? 2021-04-14
- 東莞網(wǎng)站設(shè)計公司_確定一家公司做網(wǎng)站服務(wù)? 2021-09-20
- 專業(yè)的高端網(wǎng)站設(shè)計公司要注意的4個方面 2013-10-01