SpringBoot集成Kaptcha實現(xiàn)驗證碼功能實例詳解
在一個web應用中驗證碼是一個常見的元素。不管是防止機器人還是爬蟲都有一定的作用,我們是自己編寫生產(chǎn)驗證碼的工具類,也可以使用一些比較方便的驗證碼工具。在網(wǎng)上收集一些資料之后,今天給大家介紹一下kaptcha的和springboot一起使用的簡單例子。
創(chuàng)新互聯(lián)建站-專業(yè)網(wǎng)站定制、快速模板網(wǎng)站建設(shè)、高性價比衛(wèi)輝網(wǎng)站開發(fā)、企業(yè)建站全套包干低至880元,成熟完善的模板庫,直接使用。一站式衛(wèi)輝網(wǎng)站制作公司更省心,省錢,快速模板網(wǎng)站建設(shè)找我們,業(yè)務覆蓋衛(wèi)輝地區(qū)。費用合理售后完善,十年實體公司更值得信賴。
準備工作:
1.你要有一個springboot的hello world的工程,并能正常運行。
2.導入kaptcha的maven:
<!-- https://mvnrepository.com/artifact/com.github.penggle/kaptcha -->
<dependency>
 <groupId>com.github.penggle</groupId>
 <artifactId>kaptcha</artifactId>
 <version>2.3.2</version>
</dependency>
開始實驗:
我們有兩種方式在springboot中使用kaptcha
第一種使用.xml的配置方式配置生成kaptcha的bean對象,在啟動類上@ImportResource這個xml文件;在controller中注入其對象并使用
第二種是把kaptcha作為工程的一個類,加上@component注解在返回kaptcha的方法中加上@Bean注解,再在controller中注入其對象。
第一種方法:
在resources中創(chuàng)建一個xxx.xml文件 如:
mykaptcha.xml文件:
<?xml version="1.0" encoding="UTF-8"?>
<beans xmlns="http://www.springframework.org/schema/beans"
 xmlns:xsi="http://www.w3.org/2001/XMLSchema-instance"
 xsi:schemaLocation="http://www.springframework.org/schema/beans http://www.springframework.org/schema/beans/spring-beans.xsd">
 <bean id="captchaProducer" class="com.google.code.kaptcha.impl.DefaultKaptcha">
  <property name="config">
   <bean class="com.google.code.kaptcha.util.Config">
    <constructor-arg type="java.util.Properties">
     <props>
      <prop key = "kaptcha.border ">yes</prop>
       <prop key="kaptcha.border.color">105,179,90</prop>
       <prop key="kaptcha.textproducer.font.color">blue</prop>
       <prop key="kaptcha.image.width">100</prop>
       <prop key="kaptcha.image.height">50</prop>
       <prop key="kaptcha.textproducer.font.size">27</prop>
       <prop key="kaptcha.session.key">code</prop>
       <prop key="kaptcha.textproducer.char.length">4</prop>
       <prop key="kaptcha.textproducer.font.names">宋體,楷體,微軟雅黑</prop>
       <prop key="kaptcha.textproducer.char.string">0123456789ABCEFGHIJKLMNOPQRSTUVWXYZ</prop>
       <prop key="kaptcha.obscurificator.impl">com.google.code.kaptcha.impl.WaterRipple</prop>
       <prop key="kaptcha.noise.color">black</prop>
       <prop key="kaptcha.noise.impl">com.google.code.kaptcha.impl.DefaultNoise</prop>
       <prop key="kaptcha.background.clear.from">185,56,213</prop>
       <prop key="kaptcha.background.clear.to">white</prop>
       <prop key="kaptcha.textproducer.char.space">3</prop>
     </props>
    </constructor-arg>
   </bean>
  </property>
 </bean>
</beans>
在springboot啟動類上引入這個文件
@SpringBootApplication
@ImportResource(locations={"classpath:mykaptcha.xml"})
public class Application {
 public static void main(String[] args) {
  SpringApplication.run(Application.class, args);
 }
}
在controller中使用:
@Autowired
DefaultKaptcha defaultKaptcha;
......
@RequestMapping("/defaultKaptcha")
 public void defaultKaptcha(HttpServletRequest httpServletRequest,HttpServletResponse httpServletResponse) throws Exception{
   byte[] captchaChallengeAsJpeg = null;
    ByteArrayOutputStream jpegOutputStream = new ByteArrayOutputStream();
    try {
    //生產(chǎn)驗證碼字符串并保存到session中
    String createText = defaultKaptcha.createText();
    httpServletRequest.getSession().setAttribute("vrifyCode", createText);
    //使用生產(chǎn)的驗證碼字符串返回一個BufferedImage對象并轉(zhuǎn)為byte寫入到byte數(shù)組中
    BufferedImage challenge = defaultKaptcha.createImage(createText);
    ImageIO.write(challenge, "jpg", jpegOutputStream);
    } catch (IllegalArgumentException e) {
     httpServletResponse.sendError(HttpServletResponse.SC_NOT_FOUND);
     return;
    }
    //定義response輸出類型為image/jpeg類型,使用response輸出流輸出圖片的byte數(shù)組
    captchaChallengeAsJpeg = jpegOutputStream.toByteArray();
    httpServletResponse.setHeader("Cache-Control", "no-store");
    httpServletResponse.setHeader("Pragma", "no-cache");
    httpServletResponse.setDateHeader("Expires", 0);
    httpServletResponse.setContentType("image/jpeg");
    ServletOutputStream responseOutputStream =
      httpServletResponse.getOutputStream();
    responseOutputStream.write(captchaChallengeAsJpeg);
    responseOutputStream.flush();
    responseOutputStream.close();
 }
驗證的方法:
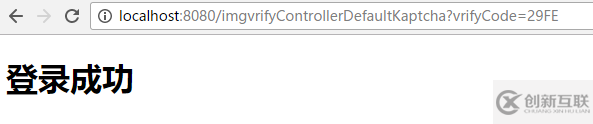
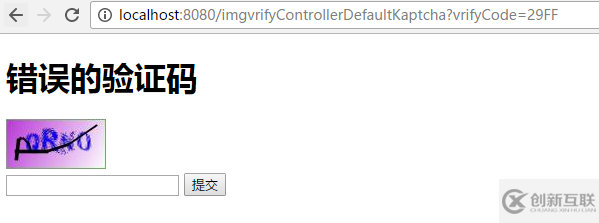
@RequestMapping("/imgvrifyControllerDefaultKaptcha")
public ModelAndView imgvrifyControllerDefaultKaptcha(HttpServletRequest httpServletRequest,HttpServletResponse httpServletResponse){
ModelAndView andView = new ModelAndView();
String captchaId = (String) httpServletRequest.getSession().getAttribute("vrifyCode");
String parameter = httpServletRequest.getParameter("vrifyCode");
System.out.println("Session vrifyCode "+captchaId+" form vrifyCode "+parameter);
if (!captchaId.equals(parameter)) {
andView.addObject("info", "錯誤的驗證碼");
andView.setViewName("index");
} else {
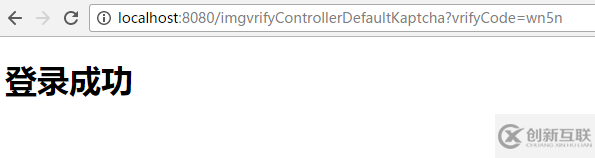
andView.addObject("info", "登錄成功");
andView.setViewName("succeed");
}
return andView;
} 模板html:
<!DOCTYPE html>
<html>
<head lang="en">
<meta charset="UTF-8" />
<title>hello</title>
</head>
<body>
<h2 th:text="${info}" />
<div>
<!-- <img alt="這是圖片" src="/img/001.png"/> -->
<img alt="驗證碼" onclick = "this.src='/defaultKaptcha?d='+new Date()*1" src="/defaultKaptcha" />
</div>
<form action="imgvrifyControllerDefaultKaptcha">
<input type="text" name="vrifyCode" />
<input type="submit" value="提交"></input>
</form>
</body>
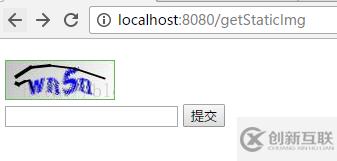
</html> 啟動并訪問:
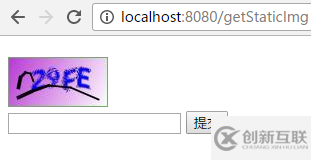
提交:
第二中方發(fā):
這種方法把.xml文件換成使用代碼來配置:
KaptchaConfig.Java:
import java.util.Properties;
import org.springframework.context.annotation.Bean;
import org.springframework.stereotype.Component;
import com.google.code.kaptcha.impl.DefaultKaptcha;
import com.google.code.kaptcha.util.Config;
@Component
public class KaptchaConfig {
 @Bean
 public DefaultKaptcha getDefaultKaptcha(){
  com.google.code.kaptcha.impl.DefaultKaptcha defaultKaptcha = new com.google.code.kaptcha.impl.DefaultKaptcha();
  Properties properties = new Properties();
  properties.setProperty("kaptcha.border", "yes");
  properties.setProperty("kaptcha.border.color", "105,179,90");
  properties.setProperty("kaptcha.textproducer.font.color", "blue");
  properties.setProperty("kaptcha.image.width", "110");
  properties.setProperty("kaptcha.image.height", "40");
  properties.setProperty("kaptcha.textproducer.font.size", "30");
  properties.setProperty("kaptcha.session.key", "code");
  properties.setProperty("kaptcha.textproducer.char.length", "4");
  properties.setProperty("kaptcha.textproducer.font.names", "宋體,楷體,微軟雅黑");
  Config config = new Config(properties);
  defaultKaptcha.setConfig(config);
  return defaultKaptcha;
 }
}
注意要去掉啟動類中引入的.xml文件,不然會有兩個相同的對象,而你沒有指明要注入哪一個的話啟動會失敗。
啟動并測試:
到這里就算成功了。(也有使用jcaptcha的,只是他們最好不要再一個工程中使用,使用到了相同的類,有時候會導致異常。)
補充:對于kaptcha的配置屬性大家可以找找,根據(jù)屬性就可以配置了。
總結(jié)
以上所述是小編給大家介紹的SpringBoot 集成Kaptcha實現(xiàn)驗證碼功能實例詳解,希望對大家有所幫助,如果大家有任何疑問請給我留言,小編會及時回復大家的。在此也非常感謝大家對創(chuàng)新互聯(lián)網(wǎng)站的支持!
標題名稱:SpringBoot集成Kaptcha實現(xiàn)驗證碼功能實例詳解
新聞來源:http://www.chinadenli.net/article26/jogojg.html
成都網(wǎng)站建設(shè)公司_創(chuàng)新互聯(lián),為您提供自適應網(wǎng)站、搜索引擎優(yōu)化、靜態(tài)網(wǎng)站、建站公司、網(wǎng)站導航、網(wǎng)站收錄
聲明:本網(wǎng)站發(fā)布的內(nèi)容(圖片、視頻和文字)以用戶投稿、用戶轉(zhuǎn)載內(nèi)容為主,如果涉及侵權(quán)請盡快告知,我們將會在第一時間刪除。文章觀點不代表本網(wǎng)站立場,如需處理請聯(lián)系客服。電話:028-86922220;郵箱:631063699@qq.com。內(nèi)容未經(jīng)允許不得轉(zhuǎn)載,或轉(zhuǎn)載時需注明來源: 創(chuàng)新互聯(lián)

- 做高端手機網(wǎng)站建設(shè)必須要精細化 2021-01-07
- 廣州手機網(wǎng)站建設(shè)有哪些特點? 2022-05-14
- 談談手機網(wǎng)站制作對企業(yè)的幫助 2016-09-26
- 手機淘寶首頁將大改動的相關(guān)內(nèi)容 2015-02-18
- 深圳獨立手機網(wǎng)站建設(shè)的優(yōu)勢 2021-12-16
- 網(wǎng)站建設(shè)說說手機網(wǎng)站設(shè)計中的色彩心理學原理 2016-09-01
- 制作手機網(wǎng)站的12條推薦 2014-04-11
- 手機網(wǎng)站建設(shè)正在向用戶體驗設(shè)計靠攏 2020-07-19
- 優(yōu)秀的手機網(wǎng)站建設(shè)應該滿足什么條件 2016-08-06
- 手機端網(wǎng)站和PC端網(wǎng)站建設(shè)需要注意的事項 2016-02-18
- 怎樣才是合理的手機網(wǎng)站設(shè)計? 2016-08-22
- 移動端手機網(wǎng)站建設(shè)需要注意的事項 2022-05-17