openSUSE12.1下如何搭建Web服務(wù)器
這篇文章給大家分享的是有關(guān)openSUSE 12.1下如何搭建Web服務(wù)器的內(nèi)容。小編覺得挺實用的,因此分享給大家做個參考,一起跟隨小編過來看看吧。
青海ssl適用于網(wǎng)站、小程序/APP、API接口等需要進(jìn)行數(shù)據(jù)傳輸應(yīng)用場景,ssl證書未來市場廣闊!成為成都創(chuàng)新互聯(lián)的ssl證書銷售渠道,可以享受市場價格4-6折優(yōu)惠!如果有意向歡迎電話聯(lián)系或者加微信:13518219792(備注:SSL證書合作)期待與您的合作!
1.開始說明
本教程中使用的IP地址是192.168.0.100,主機(jī)名稱為Server1.example.com 這些設(shè)置可能會有所不同,你需要根據(jù)不同情況進(jìn)行修改。
openSUSE 12.1下安裝MySQL5
2.安裝MySQL5
首先我們需要先用下面的命令安裝MySQL5:
yast2 -i mysql mysql-client mysql-community-server
然后我們需要創(chuàng)建MySQL系統(tǒng)的啟動鍵鏈接啟動MySQL服務(wù)器,這樣以便于MySQL在系統(tǒng)啟動時自動啟動,
systemctl enable mysql.service
systemctl start mysql.service
為了確保MySQL的安裝完成,運(yùn)行:
mysql_secure_installation
下面會遇到下面的提示問題;
server1:~ # mysql_secure_installation
NOTE: RUNNING ALL PARTS OF THIS SCRIPT IS RECOMMENDED FOR ALL MySQL
SERVERS IN PRODUCTION USE! PLEASE READ EACH STEP CAREFULLY!
In order to log into MySQL to secure it, we'll need the current
password for the root user. If you've just installed MySQL, and
you haven't set the root password yet, the password will be blank,
so you should just press enter here.
Enter current password for root (enter for none): <-- 輸入密碼
OK, successfully used password, moving on...
Setting the root password ensures that nobody can log into the MySQL
root user without the proper authorisation.
Set root password? [Y/n] <-- 輸入Y
New password: <-- 設(shè)置數(shù)據(jù)庫密碼
Re-enter new password: <-- 重新輸入數(shù)據(jù)庫密碼
Password updated successfully!
Reloading privilege tables..
... Success!
By default, a MySQL installation has an anonymous user, allowing anyone
to log into MySQL without having to have a user account created for
them. This is intended only for testing, and to make the installation
go a bit smoother. You should remove them before moving into a
production environment.
Remove anonymous users? [Y/n] <-- 選擇Y
... Success!
Normally, root should only be allowed to connect from 'localhost'. This
ensures that someone cannot guess at the root password from the network.
Disallow root login remotely? [Y/n] <-- 選擇Y
... Success!
By default, MySQL comes with a database named 'test' that anyone can
access. This is also intended only for testing, and should be removed
before moving into a production environment.
Remove test database and access to it? [Y/n] <-- 選擇Y
- Dropping test database...
... Success!
- Removing privileges on test database...
... Success!
Reloading the privilege tables will ensure that all changes made so far
will take effect immediately.
Reload privilege tables now? [Y/n] <-- 選擇Y
... Success!
Cleaning up...
All done! If you've completed all of the above steps, your MySQL
installation should now be secure.
Thanks for using MySQL!
server1:~ #
現(xiàn)在你的MySQL安裝應(yīng)成功了
openSUSE 12.1下安裝Apache2
3.openSUSE 12.1下安裝Apache2
Apache2的是作為一個openSUSE的軟件包,因此,我們可以用下面命令安裝它:
yast2 -i apache2
現(xiàn)在配置系統(tǒng)在引導(dǎo)時啟動Apache
systemctl enable apache2.service
并啟動Apache2
systemctl start apache2.service
現(xiàn)在,在您的瀏覽器輸入http://192.168.0.100,你應(yīng)該看到Apache2的首頁頁(不用擔(dān)心403錯誤,這種情況,因為有沒有索引文件(例如index.html的文件根目錄)) :
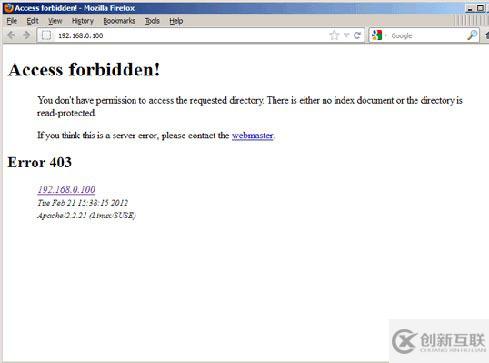
錯誤提示
Apache的默認(rèn)文檔根目錄是在openSUSE上的/srv/www/htdocs/目錄 ,配置文件是/etc/apache2/httpd.conf。配置存儲在的/etc/apache2/conf.d /目錄。
4.安裝PHP5
我們可以安裝PHP5和Apache的PHP5的模塊如下:
yast2 -i apache2-mod_php5
事后我們必須重新啟動Apache:
systemctl restart apache2.service
openSUSE 12.1下此時PHP5
5.測試PHP5并獲取PHP5的安裝信息
默認(rèn)網(wǎng)站的文件根目錄是在/srv/www/htdocs/中。現(xiàn)在我們將在該目錄中創(chuàng)建一個小型PHP文件(info.php的)和在瀏覽器中調(diào)用它。該文件將顯示很多關(guān)于我們的PHP安裝,如安裝的PHP版本和有用的一些細(xì)節(jié)。
vi /srv/www/htdocs/info.php PHP設(shè)置
如果您得到的消息是你沒有一個有效的Vim安裝的二進(jìn)制軟件包。請安裝“VIM”,“vim的增強(qiáng)型”或者“gvim”,請運(yùn)行:
yast2 -i vim
安裝VI并再次嘗試。
現(xiàn)在,我們請在瀏覽器(如文件http://192.168.0.100/info.php):
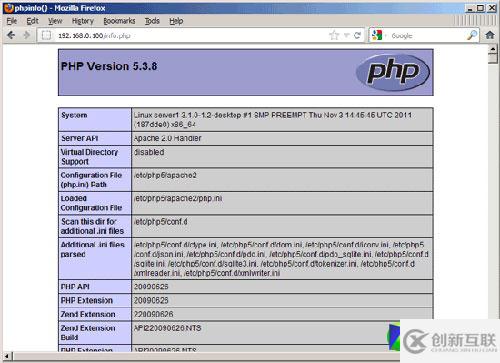
PHP首頁
正如你所看到的,PHP5的工作,它通過Apache 2.0的處理程序,在服務(wù)器API線。如果你繼續(xù)向下滾動,你會看到所有在PHP5中已經(jīng)啟用的模塊。MySQL是沒有列出,這意味著我們沒有在PHP5支持MySQL。
6.獲得MySQL支持
讓PHP在MySQL中獲得支持,我們可以安裝的php5-mysql軟件包。安裝一些其他的PHP5模塊,以及您可能需要的應(yīng)用程序,這是一個好主意:
yast2 -i php5-mysql php5-bcmath php5-bz2 php5-calendar php5-ctype php5-curl php5-dom php5-ftp php5-gd php5-gettext php5-gmp php5-iconv php5-imap php5-ldap php5-mbstring php5-mcrypt php5-odbc php5-openssl php5-pcntl php5-pgsql php5-posix php5-shmop php5-snmp php5-soap php5-sockets php5-sqlite php5-sysvsem php5-tokenizer php5-wddx php5-xmlrpc php5-xsl php5-zlib php5-exif php5-fastcgi php5-pear php5-sysvmsg php5-sysvshm
現(xiàn)在重新啟動Apache2的:
systemctl restart apache2.service
現(xiàn)在,重載http://192.168.0.100/info.php在您的瀏覽器,并再次向下滾動到模塊部分。現(xiàn)在,你應(yīng)該找到許多新的模塊,包括MySQL模塊:
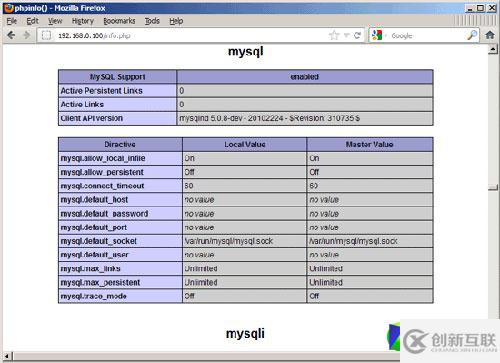
MYSQL顯示
openSUSE 12.1下安裝phpMyAdmin
7. 安裝phpMyAdmin
phpMyAdmin是一個網(wǎng)絡(luò)接口,通過它可以管理你的MySQL數(shù)據(jù)庫。
phpMyAdmin的可安裝如下:
yast2 -i phpMyAdmin
為了確保我們稍后通過ISPConfig創(chuàng)建的所有網(wǎng)站訪問phpMyAdmin的可以和登錄使用phpmyadmin(http://www.example.com/phpmyadmin)和phpMyAdmin(如http://www.example.com/phpMyAdmin),打開/ etc/apache2/conf.d/phpMyAdmin.conf文件設(shè)置
vi /etc/apache2/conf.d/phpMyAdmin.conf
并開始添加以下兩個別名:

設(shè)置別名
重新啟動Apache:
systemctl restart apache2.service
在地址欄輸入http://192.168.0.100/phpMyAdmin/:你就可以訪問phpMyAdmin了。

感謝各位的閱讀!關(guān)于“openSUSE 12.1下如何搭建Web服務(wù)器”這篇文章就分享到這里了,希望以上內(nèi)容可以對大家有一定的幫助,讓大家可以學(xué)到更多知識,如果覺得文章不錯,可以把它分享出去讓更多的人看到吧!
網(wǎng)站標(biāo)題:openSUSE12.1下如何搭建Web服務(wù)器
文章路徑:http://www.chinadenli.net/article2/gpdcoc.html
成都網(wǎng)站建設(shè)公司_創(chuàng)新互聯(lián),為您提供App開發(fā)、建站公司、企業(yè)建站、商城網(wǎng)站、面包屑導(dǎo)航、標(biāo)簽優(yōu)化
聲明:本網(wǎng)站發(fā)布的內(nèi)容(圖片、視頻和文字)以用戶投稿、用戶轉(zhuǎn)載內(nèi)容為主,如果涉及侵權(quán)請盡快告知,我們將會在第一時間刪除。文章觀點不代表本網(wǎng)站立場,如需處理請聯(lián)系客服。電話:028-86922220;郵箱:631063699@qq.com。內(nèi)容未經(jīng)允許不得轉(zhuǎn)載,或轉(zhuǎn)載時需注明來源: 創(chuàng)新互聯(lián)

- 成都網(wǎng)站制作淺析營銷型網(wǎng)站建設(shè)五要素 2016-09-26
- 阿拉善營銷型網(wǎng)站建設(shè)實際效果受哪些因素影響? 2023-03-03
- 營銷型網(wǎng)站建設(shè)和普通網(wǎng)站制作的區(qū)別在哪里? 2022-04-27
- 閘北SEO優(yōu)化技巧讓營銷型網(wǎng)站建設(shè)更專業(yè) 2020-11-15
- 合肥企業(yè)營銷型網(wǎng)站建設(shè)費(fèi)用憑什么要好幾萬 2022-05-24
- 進(jìn)行營銷型網(wǎng)站建設(shè)有哪些細(xì)節(jié)需要注意? 2021-08-16
- 營銷型網(wǎng)站建設(shè)不可缺少的幾點要素 2022-08-06
- 戶外游樂設(shè)備外貿(mào)企業(yè),營銷型網(wǎng)站建設(shè),靠譜嗎? 2016-03-26
- 如何才能找到一家專業(yè)的營銷型網(wǎng)站建設(shè)公司 2022-09-14
- 外貿(mào)營銷型網(wǎng)站建設(shè)攻略 2013-10-06
- 營銷型網(wǎng)站建設(shè)有哪些優(yōu)點?具備哪些特征? 2022-08-05
- 創(chuàng)新互聯(lián)在營銷型網(wǎng)站建設(shè)上的服務(wù)范圍。 2018-11-10