如何在springboot中使用IDEA遠(yuǎn)程連接Debug
這篇文章主要介紹“如何在springboot中使用IDEA遠(yuǎn)程連接Debug”,在日常操作中,相信很多人在如何在springboot中使用IDEA遠(yuǎn)程連接Debug問(wèn)題上存在疑惑,小編查閱了各式資料,整理出簡(jiǎn)單好用的操作方法,希望對(duì)大家解答”如何在springboot中使用IDEA遠(yuǎn)程連接Debug”的疑惑有所幫助!接下來(lái),請(qǐng)跟著小編一起來(lái)學(xué)習(xí)吧!
創(chuàng)新互聯(lián)是一家集網(wǎng)站建設(shè),臨安企業(yè)網(wǎng)站建設(shè),臨安品牌網(wǎng)站建設(shè),網(wǎng)站定制,臨安網(wǎng)站建設(shè)報(bào)價(jià),網(wǎng)絡(luò)營(yíng)銷(xiāo),網(wǎng)絡(luò)優(yōu)化,臨安網(wǎng)站推廣為一體的創(chuàng)新建站企業(yè),幫助傳統(tǒng)企業(yè)提升企業(yè)形象加強(qiáng)企業(yè)競(jìng)爭(zhēng)力。可充分滿(mǎn)足這一群體相比中小企業(yè)更為豐富、高端、多元的互聯(lián)網(wǎng)需求。同時(shí)我們時(shí)刻保持專(zhuān)業(yè)、時(shí)尚、前沿,時(shí)刻以成就客戶(hù)成長(zhǎng)自我,堅(jiān)持不斷學(xué)習(xí)、思考、沉淀、凈化自己,讓我們?yōu)楦嗟钠髽I(yè)打造出實(shí)用型網(wǎng)站。
1、先創(chuàng)建一個(gè)準(zhǔn)備遠(yuǎn)程調(diào)試的Demo,注意構(gòu)建項(xiàng)目的配置
<?xml version="1.0" encoding="UTF-8"?>
<project xmlns="http://maven.apache.org/POM/4.0.0" xmlns:xsi="http://www.w3.org/2001/XMLSchema-instance"
	xsi:schemaLocation="http://maven.apache.org/POM/4.0.0 https://maven.apache.org/xsd/maven-4.0.0.xsd">
	<modelVersion>4.0.0</modelVersion>
	<parent>
		<groupId>org.springframework.boot</groupId>
		<artifactId>spring-boot-starter-parent</artifactId>
		<version>2.1.4.RELEASE</version>
		<relativePath/> <!-- lookup parent from repository -->
	</parent>
	<groupId>com.remote.test</groupId>
	<artifactId>remote_test</artifactId>
	<version>0.0.1-SNAPSHOT</version>
	<name>remote_test</name>
	<description>Demo project for Spring Boot</description>

	<properties>
		<java.version>1.8</java.version>
	</properties>

	<dependencies>
		<dependency>
			<groupId>org.springframework.boot</groupId>
			<artifactId>spring-boot-starter</artifactId>
		</dependency>

		<dependency>
			<groupId>org.springframework.boot</groupId>
			<artifactId>spring-boot-starter-test</artifactId>
			<scope>test</scope>
		</dependency>
		<dependency>
			<groupId>org.springframework.boot</groupId>
			<artifactId>spring-boot-starter-web</artifactId>
		</dependency>
		<dependency>
			<groupId>org.junit.jupiter</groupId>
			<artifactId>junit-jupiter-api</artifactId>
			<version>RELEASE</version>
			<scope>test</scope>
		</dependency>
	</dependencies>

	<build>
		<plugins>
			<plugin>
				<groupId>org.apache.maven.plugins</groupId>
				<artifactId>maven-shade-plugin</artifactId>
				<version>2.2</version>
				<dependencies>
					<dependency>
						<groupId>org.springframework.boot</groupId>
						<artifactId>spring-boot-maven-plugin</artifactId>
						<version>2.1.4.RELEASE</version>
					</dependency>
				</dependencies>
				<configuration>
					<keepDependenciesWithProvidedScope>true</keepDependenciesWithProvidedScope>
					<createDependencyReducedPom>false</createDependencyReducedPom>
					<filters>
						<filter>
							<artifact>*:*</artifact>
							<excludes>
								<exclude>META-INF/*.SF</exclude>
								<exclude>META-INF/*.DSA</exclude>
								<exclude>META-INF/*.RSA</exclude>
							</excludes>
						</filter>
					</filters>
				</configuration>
				<executions>
					<execution>
						<phase>package</phase>
						<goals>
							<goal>shade</goal>
						</goals>
						<configuration>
							<finalName>${project.artifactId}-${project.version}-all</finalName>
							<transformers>
								<transformer implementation="org.apache.maven.plugins.shade.resource.AppendingTransformer">
									<resource>META-INF/spring.handlers</resource>
								</transformer>
								<transformer implementation="org.springframework.boot.maven.PropertiesMergingResourceTransformer">
									<resource>META-INF/spring.factories</resource>
								</transformer>
								<transformer implementation="org.apache.maven.plugins.shade.resource.AppendingTransformer">
									<resource>META-INF/spring.schemas</resource>
								</transformer>
								<transformer implementation="org.apache.maven.plugins.shade.resource.ServicesResourceTransformer"/>
								<transformer implementation="org.apache.maven.plugins.shade.resource.ManifestResourceTransformer">
									<!--根據(jù)項(xiàng)目的全名指定啟動(dòng)類(lèi)-->
                                    <mainClass>com.remote.test.remote_test.RemoteTestApplication</mainClass>
								</transformer>
							</transformers>
						</configuration>
					</execution>
				</executions>
			</plugin>
		</plugins>
	</build>
</project>
package com.remote.test.remote_test;
import org.slf4j.Logger;
import org.slf4j.LoggerFactory;
import org.springframework.web.bind.annotation.PostMapping;
import org.springframework.web.bind.annotation.RequestMapping;
import org.springframework.web.bind.annotation.RequestParam;
import org.springframework.web.bind.annotation.RestController;
import java.util.HashMap;
import java.util.Map;
@RestController
@RequestMapping("remote/test")
public class UserController {
private static final Logger logger = LoggerFactory.getLogger(UserController.class);
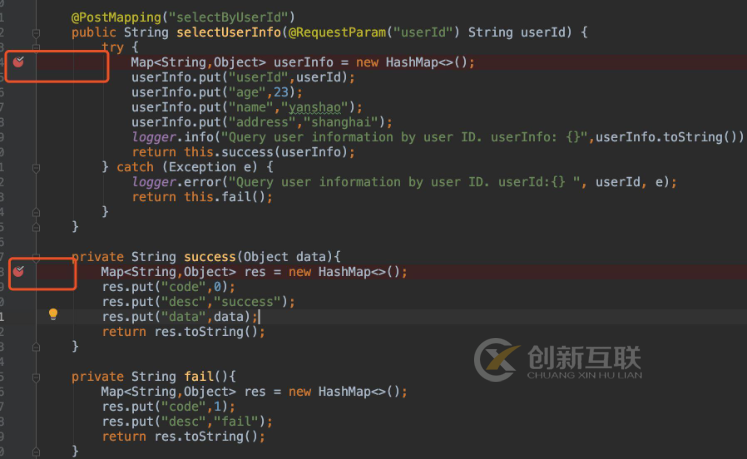
@PostMapping("selectByUserId")
public String selectUserInfo(@RequestParam("userId") String userId) {
try {
Map<String,Object> userInfo = new HashMap<>();
userInfo.put("userId",userId);
userInfo.put("age",23);
userInfo.put("name","yanshao");
userInfo.put("address","shanghai");
logger.info("Query user information by user ID. userInfo: {}",userInfo.toString());
return this.success(userInfo);
} catch (Exception e) {
logger.error("Query user information by user ID. userId:{} ", userId, e);
return this.fail();
}
}
private String success(Object data){
Map<String,Object> res = new HashMap<>();
res.put("code",0);
res.put("desc","success");
res.put("data",data);
return res.toString();
}
private String fail(){
Map<String,Object> res = new HashMap<>();
res.put("code",1);
res.put("desc","fail");
return res.toString();
}
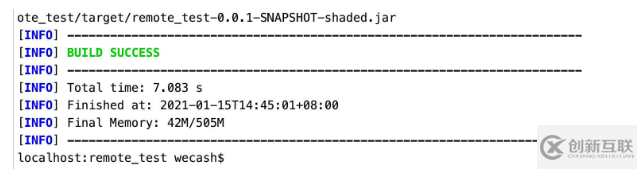
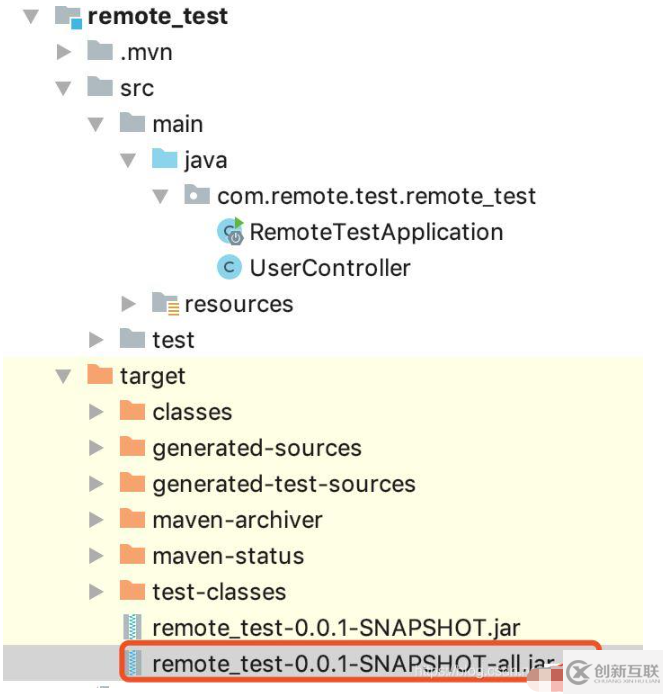
}2、打包
輸入:mvn clean package,(大概需要等幾分鐘),最好在構(gòu)建之前指定本地repository,就不需要重新下載jar包了。
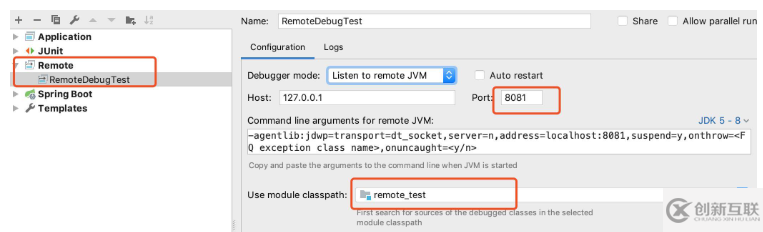
3、在IDEA配置遠(yuǎn)程Debug
指定socket port = 8081,指定準(zhǔn)備debug的模塊
4、在終端啟動(dòng)剛才打好的jar包
a. 先在IDEA啟動(dòng)debug

b. 然后在終端輸入命令:java -agentlib:jdwp=transport=dt_socket,server=n,address=localhost:8081 -jar remote_test-0.0.1-SNAPSHOT-all.jar
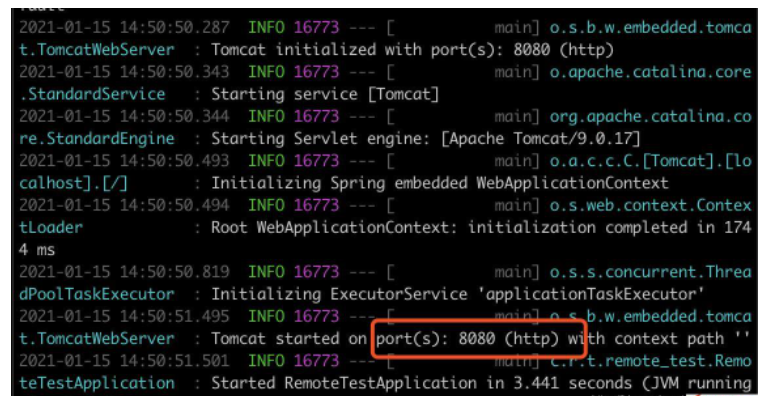
5、測(cè)試
在準(zhǔn)備請(qǐng)求的接口上標(biāo)記斷點(diǎn)
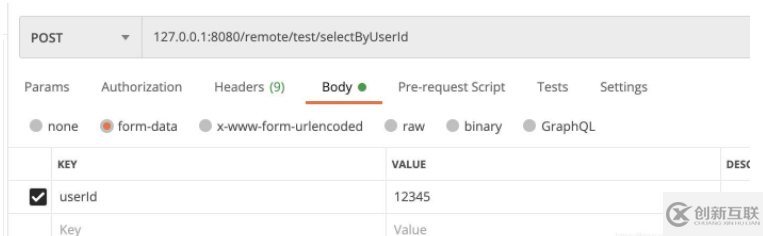
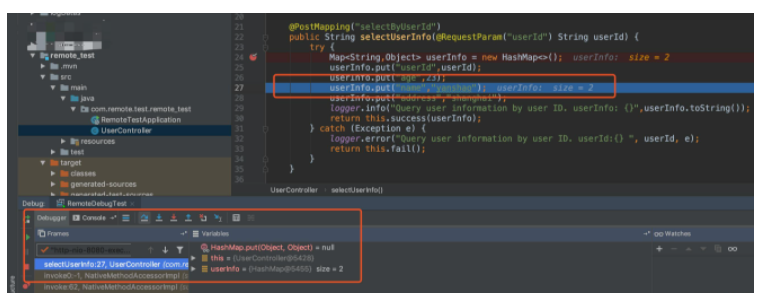
注意:必須先在IDEA啟動(dòng)Debug,然后再啟動(dòng)項(xiàng)目
? Desktop java -agentlib:jdwp=transport=dt_socket,server=n,address=localhost:8081 -jar remote_test-0.0.1-SNAPSHOT-all.jar
ERROR: transport error 202: connect failed: Connection refused
ERROR: JDWP Transport dt_socket failed to initialize, TRANSPORT_INIT(510)
JDWP exit error AGENT_ERROR_TRANSPORT_INIT(197): No transports initialized [debugInit.c:750]
到此,關(guān)于“如何在springboot中使用IDEA遠(yuǎn)程連接Debug”的學(xué)習(xí)就結(jié)束了,希望能夠解決大家的疑惑。理論與實(shí)踐的搭配能更好的幫助大家學(xué)習(xí),快去試試吧!若想繼續(xù)學(xué)習(xí)更多相關(guān)知識(shí),請(qǐng)繼續(xù)關(guān)注創(chuàng)新互聯(lián)網(wǎng)站,小編會(huì)繼續(xù)努力為大家?guī)?lái)更多實(shí)用的文章!
本文名稱(chēng):如何在springboot中使用IDEA遠(yuǎn)程連接Debug
當(dāng)前地址:http://www.chinadenli.net/article18/iphggp.html
成都網(wǎng)站建設(shè)公司_創(chuàng)新互聯(lián),為您提供做網(wǎng)站、微信小程序、動(dòng)態(tài)網(wǎng)站、云服務(wù)器、Google、商城網(wǎng)站
聲明:本網(wǎng)站發(fā)布的內(nèi)容(圖片、視頻和文字)以用戶(hù)投稿、用戶(hù)轉(zhuǎn)載內(nèi)容為主,如果涉及侵權(quán)請(qǐng)盡快告知,我們將會(huì)在第一時(shí)間刪除。文章觀(guān)點(diǎn)不代表本網(wǎng)站立場(chǎng),如需處理請(qǐng)聯(lián)系客服。電話(huà):028-86922220;郵箱:631063699@qq.com。內(nèi)容未經(jīng)允許不得轉(zhuǎn)載,或轉(zhuǎn)載時(shí)需注明來(lái)源: 創(chuàng)新互聯(lián)
猜你還喜歡下面的內(nèi)容

移動(dòng)網(wǎng)站建設(shè)知識(shí)
- 移動(dòng)網(wǎng)站建設(shè)成功與失敗的決定性因素有哪些? 2017-01-25
- 移動(dòng)網(wǎng)站建設(shè)和優(yōu)化需要避免的誤區(qū) 2023-04-05
- 淺析移動(dòng)網(wǎng)站建設(shè)的一些經(jīng)驗(yàn)分享 2016-10-20
- 移動(dòng)網(wǎng)站建設(shè)容易進(jìn)入的誤區(qū) 2021-12-10
- 移動(dòng)網(wǎng)站建設(shè)如何突出產(chǎn)品信息 2014-09-24
- 移動(dòng)網(wǎng)站建設(shè)更多優(yōu)勢(shì) 2022-04-15
- 移動(dòng)網(wǎng)站建設(shè):從瀏覽者的角度提出幾點(diǎn)優(yōu)化建議 2021-07-26
- 做移動(dòng)網(wǎng)站建設(shè)應(yīng)注意哪幾點(diǎn)?經(jīng)驗(yàn)種草 2022-08-07
- 移動(dòng)網(wǎng)站建設(shè)預(yù)算已成為有效方式 2016-08-21
- 移動(dòng)網(wǎng)站建設(shè)中不可或缺的四大要素 2016-11-04
- 移動(dòng)網(wǎng)站建設(shè)十大原則 2022-11-28
- 手機(jī)端移動(dòng)網(wǎng)站建設(shè)需要注意哪些問(wèn)題呢? 2013-12-19